Friday, August 20, 2010

Coffee Alternatives

I have been having A LOT of trouble sleeping lately. I think it may in part be due to drinking too much coffee. Unfortunately, not sleeping well is making me very tired when I get up for work in the morning, making me drink more coffee – it’s a terrible cycle.

So now I’m looking for alternatives to caffeine. I heard that eating an apple can be equivalent to drinking a cup of coffee, but I’m not sure if I believe that one. After all, I’ve eaten apples before, and I can’t say I’ve noticed it wakes me up especially.

Ginseng is generally accepted as the best alternative to caffeine. It's not habit-forming, the way caffeine is, and is said to help you stay more alert and energetic, but I am going to have a little trouble finding it in Iqaluit.

Cinnamon tea is supposed to help wake you up by improving your circulation, and regulating your blood sugar by improving the effectiveness of insulin. I used to make cinnamon tea by boiling some cinnamon sticks in a pot of water. It’s actually really good – almost sweet, but that could just be a mental association of cinnamon with sugar. It even tastes good iced. It also has a beautiful red-brown colour to it, making me wonder whether or not it would make a good dye. Hmmm….
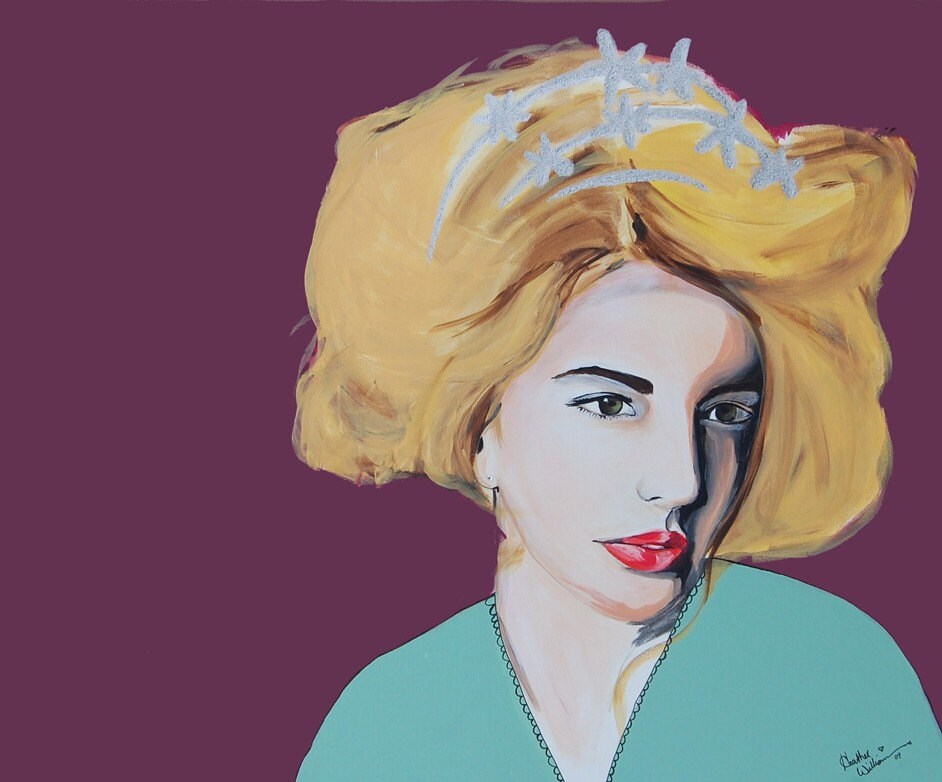

On another note, today, I was introduced to the art of Heather Williams. She does fantastic mixed-media pieces of women with wonderful style. They're amazing, and very affordable! The colours and textures are just so vibrant and surreal.

I was also intrigued by this post from software developer Matt Katz, in which he describes the process of making an engagement ring! My boyfriend frequently jokes about making an engagement ring for me, but his plans often involve the inclusion of lasers...

Thursday, August 19, 2010

Swapping Postcards

A while ago, a friend of mine introduced me to Swap-bot. It's a fun little website where you can host swaps to send items to randomly chosen partners through snail mail.

I joined in the hopes of finding another outlet for my creativity - I wanted to use up supplies I had around the house in things I would never have done for myself, and also I wanted to try new crafts. However, I almost immediately went to work on Baffin Island for the summer where I have no access to my crafting supplies (or, for that matter, a post office).

A couple of weeks ago I started working out of Iqaluit, the largest community on the island - a government town of roughly 5,000 people. And, of course, it has a post office.

Since I'm still away from my crafting supplies, I have really gotten into an easy and common swap: the postcard. I think the idea of sending people postcards from a rarely visited part of the world really appeals to me - some people collect them, and I think it would be a really fun addition.


I've actually learned a lot in the process about Baffin Island. One of the most interesting things is the existence of Mt. Asgard, where the base jumping scene from the beginning of James Bond's "The Spy Who Loved Me" was filmed(You can watch the video here). It's supposed to take place in the Alps. I love that they couldn't find anywhere in the alps as spectacular as what they found in the middle of Baffin Island.

I also love how cheesy that James Bond video is...

Saturday, May 15, 2010

Fabric Tape and Upholstery


After seeing this tutorial on how to make fabric tape, I had to make my own!! Above is the result, and I think I am hooked. It's made from an old shirt that just didn't sit right any more. I'd been looking for a project to make with it for a while. I think the small flowered pattern looks so nice on the tape.

Also, I saw this video, and I have been inspired. I have a set of dining chairs, a cozy chair and a dresser, all that I have plans to re-do. My only regret is that I am leaving for Baffin Island at the end of the week, and I only like to start what I'm going to finish because inspiration is fleeting...

But their work is so beautiful, I feel like I want to be an upholsterer...

Tuesday, April 27, 2010

Amazing Vintage Ceramics

I am absolutely loving these revamped vintage ceramics from Whorange. What an amazing idea!

Monday, April 5, 2010

On the Importance of Gauge


So, I finished my first serious crochet project - a scarf. I love the way it looks, and it was so simple. I just did the entire thing in treble crochet from beginning to end. It's made with Malabrigo's Silky Merino in the colour "Redwood Bark", and it is so very soft!

What surprised me the most about this project was just how quick it was. I started making this scarf with a knit pattern that gave a similar texture, and it seemed to be taking me forever. So long, that I forgot how to do the pattern, and couldn't get it back again. I wasn't even half-finished at this point. So I tore the whole thing up and started crocheting. I brought the yarn and my hook with me on a flight to Maui, thinking the one ball of yarn would get me through both flights there and back. To my surprise, I ran out of yarn halfway through the flight there! I was antsy for the rest of the flight there, but at least I had company on the return flight.

The one thing that did happen during this project was that I discovered the importance of gauge. The beginning of the scarf is 2" wider than the end. Partly because I somehow lost 4 stitches along the length of the scarf, but partly because of how much I tightened up my gauge as I went. If I were making a shirt, it would have gone up 2-3 sizes, just from changing my gauge.


I think I need to practice crochet before I make anything fitted...

Wednesday, March 31, 2010

Make yourself a simple pencil skirt in under an hour!

OK, so here's a quick tutorial for how to make a simple pencil skirt out of knit cotton fabric without a pattern. It takes exactly 3 lines of stitching to complete.

Tools you will need:

-measuring tape
-sewing machine with ball point needle
-thread
-scissors (or rotary cutter and self-healing mat)
-pins
-enough knit fabric wide enough to go around your hips and twice the desired finished length of the skirt.

Step 1: Measure

You will need three measurements:
-Your hips at their fullest
-Your waist where you want the waistband of the skirt to sit
-The desired length of the skirt from where you want the waistband to sit, to where you want the skirt to end

Step 3: Make waistband

Take your waist measurement and multiply it by 0.8 (or 80%). For example, my waist measurement is 36". 0.8 x 36 = 28.8 , but we'll just say 29. Take this measurement as the width of the waistband piece.

Measure out a piece of fabric that is 8" tall along the grain of the fabric (the less stretchy direction), and as wide as the number you determined earlier. Make sure that this piece of fabric will sit snug against your waist while wrapped around you, but is still loose enough to pull on and off over your hips. Make sure to leave enough extra for seam allowance.

For those of you who don't like math, you can just cut out a strip of fabric 8" tall and as wide as your fabric roll, then wrap it around your hips almost as tight as it will go. Move it to your waist and see if it is comfortable. If it is too tight loosen it a little. Make sure to leave enough for seam allowance.

Fold your strip of fabric in half the long way, with right sides together, and sew it into a loop. You now have a waistband.

Note: When sewing knit fabric, I like to use a short stitch length and a slight zig-zag so that it stretches nicely. On my machine, the zig-zag stitch goes from 0-4, and I set it in between 0 and 1.

Step 4: Make Skirt

For the body of the skirt you will need to cut out one long rectangle. The measurement along the width of the fabric (in the more stretchy direction) will be your hip measurement (unless you like your skirt really loose, you can take 2 or 3 inches away from the width measurement. It's knit, it will stretch). Make the length of this piece (along the grain of the fabric) twice the length you want the finished skirt to be.

Fold this piece along the width measurement (the more stretchy direction), with the right sides together, and sew up the side opposite the fold to make a tube.

Sorry for some of the washed out pictures.

Step 5: Attach the waistband to the skirt

OK, you're almost done. Fold the skirt in half along it's length with the wrong sides together, encasing the raw edges inside. Do the same with the waistband. Now place the skirt bottom inside the loop of the waistband with the raw edges facing up (and fold facing down) for both. Match the seams together and pin the waistband to the skirt, matching the raw edges, stretching the waistband to make it fit. Once you have them fitting nicely together, sew them together. Stretch the waistband as you sew to make it fit nicely onto the skirt.

Finish the raw edges any way you like, but since it's knit cotton, you shouldn't need to if you don't want to. If you have really stubborn fabric in your waistband that keeps stretching out and making the skirt not stay up, you can sew some elastic onto the raw edges to hold it in place.

And Voila! You've made yourself a brand new skirt!

* To anyone wondering about the AMAZING top I'm wearing in the first pic, it was done by my the incredible Scott at Tied up and Dyed on Gabriola Island. You can visit his website here, or catch him at all the summer farmers markets on Gabriola. I love LOVE his work for how intricate it is, and how classy he can make tie dye. I wore this shirt to the office and my co-workers were in awe of it. So am I!

Tuesday, March 30, 2010

Jackpot!!

I hit the free fabric jackpot this weekend! One of the wonderful ladies at work used to be employed at Fabricland (one of my dreams when I was a teenager - the closest I ever got was to work in their call center...). While there, she acquired quite a bit of fabric that was just sitting in her closet for the last 10 years. When she found out I could sew, she offered to give it to me. ALL OF IT!!!

I was speachless. There is sooo much, I don't know where to start. There are lots of heavier woven synthetics that I probably would never have thought to buy, but now that I have them, I'm dying to experiment and see what I can do!

I loaded up my big backpack and had a second tote bag in my hand. I had to carry it all back on the bus... When I put it away at home there were 5 grocery bags stuffed, and I mean STUFFED with fabric. My favourite is this great little woven cotton with asian river scenes. So beautiful!

Completed projects will be posted! I just hope I have time to finish a few of them before I head to Baffin Island in May...