I have been involved with the Terminal City Rollergirls for a few years now, and one of the first things I ever did with the league was to design a series of graphics to explain roller derby to the unfamiliar. Not really knowing anything about graphic design, I had and idea that I threw together with Adobe Illustrator, and I think the result was fantastic. Several years down the road, I think the rules explanations themselves could use an update, but I'm still proud of the images.
My graphics are also being used on Rollergirl.ca, and are now going to be included in a roller derby-themed kids colouring/activity book! I can't wait to see what the finished product looks like!
Also, I just found out that Baad Anna's is having a charity knit-a-thon this Sunday. Anyone who brings in a donation of canned food or ca$h for the Downtown Eastside Women's Centre in between now and then gets 10% off at the store that day. Done! They are also taking yarn donations for the knitting, and I know I have a few skeins of leftover that would be totally usable for scarves and hats. Also, anyone can join in the knitting on Sunday. I am so there!!
Monday, November 23, 2009
Saturday, November 21, 2009
Companion Cube Footstool!

A little while back I posted saying that I was going to try to finish my WIPs before the end of the year. Well, here is one of the projects I have had sitting on my shelf for a while - a fun fur Companion Cube footstool! It's made of an old milk crate with a cushion on the top I made by cutting up some leftover bits of fleece.
Here's Mike with an action shot:
 I love this thing!
Book Thong and Stitch 'n' Bitch!

K.Z. came over for some beading the other night, and I made my very first book thong! I can't help but find the name of these things funny...
I also know that with the way I treat my books, it would likely fall apart in no time. As much as I need more book marks, I don't think anything beaded is such a good idea. I made a fabric book protector out of an old pant leg a while back, but even with that, I don't think it would stand a chance.
On an unrelated topic, I am finally re-instating the monthly stitch 'n' bitch! As it stands, they will be the last Wednesday of every month. If anyone reading this wants to join and hasn't been invited, just leave me a message!
Tuesday, November 10, 2009
SOAP

I finally made my first bar of soap. It was unbelievably easy.
I used the melt-and-pour soap blocks I bought from Deserres, added colour and lavender oil I bought in Croatia, and bam! Done! If I did this again, I would probably buys the soap somewhere cheaper, but it was a fun experiment. If I had enough space, I would make proper soap with lye and glycerine, but in a pinch, this works. And I'm pretty sure the soap is vegetable based, for all the vegans out there.
Also, cleanup is easy, since all you're working with is soap...
Wednesday, November 4, 2009
Socks on a Plane!!!

Lack of posting lately has largely been due to a long trip I spent backpacking in Europe. There wasn't much crafting to be done, though we did come across a once-a-year craft fest in Pula, Croatia. It was mostly jewelry, but it was nice to feel at home again...
One thing I did bring with me for crafting was a set of needles, some merino wool, and this free online sock pattern. I have never attempted to make socks before, but thought they would be a great project for traveling because 1) they are made with small needles, so they take a while, and 2) they are small and portable.
Most people don't know that you can bring knitting needles on a plane. I have had some people tell me that they don't allow metal needles, but I have also gotten metal needles on planes, so it could be airline (or airport) dependent. To be safe, I brought bamboo needles, but acrylic would also work.
I love knitting on planes because they make the terrible movies easier to bare. I'm usually too tired to keep my eyes open on a book for too long, and I don't sleep well on planes, so knitting is a way to keep me from getting restless, while still staying in one place. I highly recommend it!
Friday, September 18, 2009
Goals and Pains
I have given myself the crafting goal to finish all my works-in-progress by the end of the year. There are quite a few of them, so I think this is a rather lofty goal. However, I need the space in my apartment, and all these bags of half-finished items are bothering me...
Things working against me achieving this goal are: The fact that I am going away for all of October on vacation (personally, I don't see this as much of a problem...), and the neck problems I have been having lately. Sore shoulders make it difficult to hunch over needles or a sewing machine. Or even a book or computer, for that matter.
Hence the lack of recent updates...
Sunday, September 13, 2009
Reinventing Chicken Pot Pie
 I had the hugest craving for chicken pot pie, but I had no idea how to make it, and felt way too lazy to look up recipes on the internet - so I just made it up.
 First, I made a stew out of the following:
-two chicken thighs
-one chopped carrot
-one stick chopped celery
-one clove crushed garlic
-1/2 a yellow onion
-1 1/2 cups chicken stock
-spices (in this case, mostly pre-packaged poultry spice since I was so lazy)
I let that simmer while I mixed up the biscuit dough. Biscuits are very simple:
Ingredients:
-2 cups white flour
-4 tsp baking powder
-1 tsp salt
-1 tsp baking soda
-about 3 tbsp cold butter (you can use more or less as you see fit)
-about 7/8 cup milk
First, I mixed together the dry ingredients, then cut in the butter using a pastry cutter until none of the butter bits were larger than a pea. I added the milk and just mixed it in - if you overmix, your biscuits will be chewy.
After the milk is mixed in, ordinarily you would take it and knead it about 10 times on a floured surface - again, if you overknead, it will be chewy. This time, however, I just sort of spread it out until it made a top "crust" for the stew in my casserole dish. This recipe usually makes about 10 biscuits, and I still had enough left over to make 3, so I used 3/4 of the dough.
I stuck this in the oven at 400 deg F for 10 minutes and presto! Chicken Pot Pie!
 Notes:
-The chicken part was a little watery. In the future, I would add something to make it thicker - some kind of starch. Potatoes or flour or cornstarch or something along those lines.
-I think the biscuit dough on the top was a little thick. I would probably use about half the entire biscuit recipe next time - it tasted a little too much of baking powder for a chicken pot pie.
-Also, it occurred to me how easy it would be to make biscuit dough ahead of time. Just do everything except add the milk, then freeze it until you're ready for biscuits. When you want to bake them, you add milk and mix until you get the proper consistency. Mmmm... biscuits.
Wednesday, September 9, 2009
How to Make and Can Applesauce
 Making and canning applesauce is super easy, and home made applesauce is REALLY tasty. I learned how to can in a high school cooking class, and I love that I did. Interestingly, I did this last night, and today I noticed this post on how to can peaches. Now I really want some peaches...
What you will need:
- apples (any kind you like, but this is a good way to use baking apples)
- sugar. How much will depend on how sweet your apples are and your tastes. Usually 1 tbsp per apple is about right.
- lemon juice
- salt
- canning jars
- a big pot
- tongs or silicone gloves
***Update*** Some fabulous person had their applesauce recipe on Craftster and they used BROWN sugar. Now why didn't I think of that??
First, you make the applesauce:
Peel, core, and slice the apples. As you cut them, put them in a bowl of cold, salted water to keep them from turning brown.
 Put the apples in a big pot with about 1 tbsp of water per apple. Cook at a low temperature with the lid on, stirring occasionally to see if they are tender. It will take around 15 minutes, but could be more or less depending on the kind of apples.
 Once they are tender, remove them from the heat. Taste the applesauce for sweetness and add as much sugar as you want. It's really nice to just make applesauce with sweeter apples and not have to add any sugar!
Now it's time to sterilize your canning jars, or you could do this while the apples are cooking. Place the jars, lids, and rings in a pot of warm, but not hot water. Just a word of warning - putting cold glass jars in hot water will make them crack!
 Bring the water to a boil and start timing. Boil the jars for 15 minutes, then remove them with your tongs or heat-proof gloves and put them on a tea-towel to dry.
Fill the jars with warm applesauce to about 1/2" from the top - no more no less. If there is too much or too little air, they will not seal properly. Run a knife around the edge of the jar to get rid of any air bubbles, then top each jar of applesauce with about 1 tsp lemon juice to keep them from turning brown.
 Next, wipe the rim of the jar to get rid of any applesauce. Place the flat part of the lid on top of the jar, then screw on the ring just finger tight. Don't tighten them too much!
 Place the jars in a pot of warm (not hot) water. There should be enough water to cover the jars by about an inch. Bring the water to a boil and boil for about 15 minutes, then remove the jars with tongs or silicone gloves.
 I seriously can't stress how awesome these gloves are. There's no fumbling around in the hot water - you just stick your hands in and get the job done! You can't leave your hands in there forever, as they will get warm after about 10 seconds, but for quick jobs they are perfect!
Anyhow, when you remove the jars, put them back on the tea-towel and let them cool overnight - check the seal in the morning. You shouldn't be able to easily remove the flat lid, and it should be slightly concave (bending in). Screw the lids on tightly at this point.
 Label your jars with the date and whatever else you want, and you're done! They should stay in the cupboard for a long time, and you have a tasty apple treat any time of the year! You will probably have to pierce the lid to break the seal and remove it, but you can buy whole boxes of replacement lids and just re-use the rings and jars. I usually have trouble keeping enough of mine to actually can...
Saturday, September 5, 2009
I Made Chandelier Earrings!
 I made my very first pair of chandelier earrings! Well, my first pair of earrings ever, in fact. My friend Anna recently took a course at Country Beads in Vancouver and has been making tons of earrings ever since. This week, she was kind enough to teach me what she learned.
My inspiration for these earrings was a necklace of fresh water pearls and silver beads that my mother bought me in the middle east. I was looking for earrings to match it, but it's pretty unique. Here is a photo of the finished earrings and the inspirational necklace:
 All the beads are glass - the "pearl" like beads are fake.
 For anyone interested in learning the technique, there are tons of resources online, including the following:
- Beadinglife.com
- A good video here
- This site shows how to make findings (the part you attach the beads to) yourself
- How to make beaded jewelry has good instructions
 I find it amazing the variety of earrings that can be made. The technique is fairly simple, but one place I saw it very accurately described as "fiddly and repetitive". It is very repetitive, but in one night you can have yourself a complete pair of earrings. From buying the beads, to learning how it's done, to finished earrings, I spent about $7 (my earrings were big with lots of beads), and 4 hours. This included bus travel to and from the bead store, and stopping for dinner, so roughly 2-3 hours of work for a beginner to make a large pair. Anna can apparently make a pair in about an hour.
Above is Anna working on her pair of earrings, and below is a close-up of me working on mine. I have discovered that I have all the tools necessary to make these beautiful earrings in my home already, but this is mostly due to the fact that my boyfriend is an electrical engineer, and has lots of tools to work with wire. I will likely be making more sometime in the future. I believe Anna said she spent about $15 on the tools at the bead shop.
 This is a picture of the earrings Anna made. I love the mix of colours! Oh, and it was total coincidence that we wound up using the same findings. There are tons of different kinds out there.
 And, because I want to show it off, this is the jewelry screen I made recently to hang it all on. There is a great Threadbanger video that shows how to do this, but I added an extra step. I stapled the mesh forward near the front of the frame, and then attached some fabric to the back so that my screen has a lovely background instead of just showing the wall behind it, and there is a space between the two so that I can still hang everything. I added drapery hooks to hang the necklaces. See the video here:
 And, finally, an action shot of the earrings!
Friday, September 4, 2009
T-Shirt Underwear and Amy Karol
Relating to this previous post, today I learned that one of my inspirations Amy Karol also makes her own underwear from old T-shirts. Amy has a new book out for anyone interested in altering the surface of patterns withe stencils, stamps, or printable designs:

Wednesday, September 2, 2009

Tuesday, September 1, 2009
The making of fuzzy D-20's

So, I am having a few issues uploading photos from the wedding from my camera, and my living room is so full of furniture I haven't been able to do much in the way of sewing (since there's a futon in the way of my sewing machine...). However, I do have some awesome images of a pair of fuzzy D-20's I made for my brother's birthday! Unfortunately, his car is not working right now...
The first thing I did was make an equilateral triangle (all 3 sides are the same length) out of paper. It was 2" to a side. I then started tracing and cutting out pink fleece triangles all the same size - 40 of them.
 Then I used a plastic stencil and dabbed on black acrylic paint. Numbers that had more than one digit, I let the first digit dry before adding the second so that the paint didn't smudge.
 Here are some of the finished triangles:
 I then started sewing the numbers together. I didn't have an actual 20-sided die to use as a model, so I just mixed up the numbers and their orientations, making sure not to duplicate any numbers since there are two dice. I sewed 5 of them together in a circle using a 1/4" seam allowance, then did the same with another five. The last 10 I sewed into a loop by alternating the orientation of the triangles.
 Then each pentagon (5 sides) is sewed onto the loop, matching the corners.
 Before attaching the second pentagon, I inserted a bit of cord and sewed across it on one edge. I also left one edge open for the string to come out, and to be able to turn it right-side out.
 I stuffed it with leftover fleece and slip-stiched the opening shut, then did the same with the other die.
Voila! Fuzzy D-20's! Always makes me think of the Cake line: "Where large fuzzy dice still hang proudly like testicles from rear-view mirrors"
Wednesday, August 26, 2009
I Made Panties!!! (tee hee)
 Ever since I saw a link to this tutorial on Instructables.com, I have been dying to try making my own. I made these from an old T-shirt that I had kicking around for a long time. I had originally planned to make a throw-pillow out of it, but it didn't work for some reason I don't remember, and I only had half the shirt left. The good news is that it only takes about a half a shirt to make a pair.
Here's a picture of the front:
 And some detailing:
 I attached the elastic using a double-needle since my serger is acting up. I really must get that fixed...
I still have a whole stack of old shirts lying around that I didn't know what to do with - you know those ones that are just too awesome to throw out, but are in too rough a shape to wear. Well, as underwear they are very comfortable, even if they may not last too long. I'm sure some of them will become yarn (dying to try this!), and I may even make a scarf if I find the right colours.
On another note, I have been loving some of the felted crafts I've been seeing around, making me want to get my hands on some wool. These earrings from Leethal Knits I find extremely inspiring.
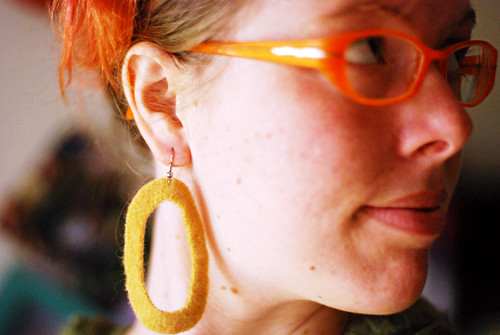 I also want to someday try to make my own felted hat... *sigh*. So much to craft, so little time.
Anyhow, tomorrow is the wedding! I will show pics of our DIY photo-booth after the weekend-of-mayhem is over!
Monday, August 24, 2009
Expandable Posts
Today I learned how to make expandable posts on Blogger! The Blog Doctor has great step-by-step (New Kids, anybody?) instructions on how to do it here. Thanks Blog Doctor!
Green dress is complete!

I finally finished the dress for the wedding! I used an old pattern from 1975 that I hadn't ever touched before... it either used to belong to my mom or I picked it up second-hand somewhere, I'm not sure which. I had to alter the pattern since it was in a size 12 and I'm more like a size 16, but it turns out this pattern is very forgiving, and it turned out great! I just added 1/2" to each seam allowance and eye-balled the curves.
The pattern is supposed to attach the halter-strap behind the neck with buttons, but I never liked that kind of attachment. I find that anything behind the neck, depending on your position, will get too tight or too loose. Here's what I did instead:
First, I measured the overlap when the straps were sitting comfortably behind my neck.
 Then, I sewed a tube of fabric about 1.5" longer than that length and the width of the strap. I then cut out 2 strips of elastic (I didn't have any wide elastic) a little longer than the length of the overlap.
 I placed the strips of fabric side by side in the fabric tube. I then cut the straps down to eliminate the overlapping ends entirely, but keeping 1/4" seam allowance, which I then folded into the strap. After that, just slip the tube and elastics into the strap, and sew the whole thing!
 I pushed the fabric of the tube down until it is level with the end of the elastics (I exaggerated a bit here to show the elastic), then sewed the other side in a similar way.
 Voila! A comfortable halter strap! And if you're wondering about the tape on my back, I have had to have that lately to keep my muscles in the correct place. It's all to help get rid of some neck/shoulder problems that I can thank working in front of a computer for...
Saturday, August 22, 2009
A new look!
I finally changed the look of the blog. Blogger is turning out to be a lot tougher to work with than I had anticipated. Changing fonts is easy, but changing things that should be simple, like a background colour, is far from intuitive. It's darker than I would like, but at least it saves power, right?
I'll have to work on it some more, I swear. I am slowly but surely figuring this beast out.
Also, I finished the dress for the wedding! Pictures are to come, but it needs an ironing before any action shots are to be taken.
I'll have to work on it some more, I swear. I am slowly but surely figuring this beast out.
Also, I finished the dress for the wedding! Pictures are to come, but it needs an ironing before any action shots are to be taken.
Thursday, August 20, 2009
Female runner being tested to check she is a woman...
Seriously.
I know this is not craft related, but I have an interest in issues of gender and sexuality, and found this story intriguing. The basics of the story are pretty simple: a winning female runner has a fairly masculine build and face and a deep voice, so they want to check to make sure she's really a woman.
What's really interesting is that it's not just a simple matter of "drop your pants and let's have a look". The process of testing 18-year-old Caster Semenya's gender will take weeks and will involve several specialists.
The part I found most intriguing is published in the paper version of the National Post story, but not online for some reason. There are conditions that may be at play where it is possible Semenya is outwardly female, but may have a hormonal imbalance, or some other genetic make-up that would alter her physiology to make her more masculine. This would affect her looks, but also her abilities. Apparently, the fabulous people from the Olympics would consider this an unfair advantage and require her to take hormone supplements, etc, before being allowed to compete professionally.
The idea of her having to artificially alter her physiology just to be able to compete in an organization that rejects that very idea seems somewhat ridiculous. Will her odd hormonal balance give her an advantage? Probably. But, why shouldn't she take advantage of that? She probably has enough gender identification issues from being barred from ladies bathrooms, etc. Why should she have to change to be considered female? Her masculine looks have probably caused her enough trouble - I think it's time she get something good out of the deal. And maybe set a few records along the way.
Tuesday, August 18, 2009
I made a bra-extender from an old bra!

OK, so the end result is none too pretty, but it was a really quick project and works extremely well. I just cut the attachment part off an old bra, and sewed it onto a double-layer of material from an old T-shirt. Everything is sewn with a zig-zag to finish the edges.
I made sure that the piece of material I was using as a base was as wide as the bra-strap I wanted it to fit, and as long as the two ends I cut off the old bra, then just fit each piece into its respective corner, and voila!
The whole reason I made this was for a lovely halter dress I am making to wear to a wedding. Unfortunately, my only strapless bra (trust me, I can't go without) is just a little too tight, making the dress way too loose in the top. It's much better now that the bra is fitting right.
Funny thing, after I finished this, I was in a really good mood and wanted to finish the dress (all I have left is the hem), but I couldn't for the life of me find the thread to match it. My boyfriend and I tore the entire apartment apart looking for it. Eventually I just gave up, not wanting to sew anymore. I went to put the cover on the sewing machine, and noticed a trail of green thread coming out of it. It turns out the spool of thread was stuck in the sewing machine cover!! I couldn't stop laughing for a while after that one...
Burlesque + DIY = BFF?

I love burlesque. But, then again, who doesn't? Strong women creating beautiful fantasies before your eyes, or just evoking hilarious imagery that makes you laugh 'til you hurt. The variety of shows is endless. I have seen ladies dressed in period costume swaying to sensual beats. I have seen robots with flashing innards "connecting" with each other. I have seen monsters, and cats, and zombies, and so so so much more.
Through all the variety burlesque has to offer, there is one thing that most of it has in common: DIY. Since show are so unique, the amazing costumes and props are often created by the performers themselves. One performer I love is Vienna La Rouge, formerly from Seattle, now residing in California. She hand-decorates her delicious corsets with thousands of Swarovski crystals.
Such creativity does not come without a cost that most crafters will find familiar. Talk to just about any burlesque artist, and they will tell you how their home is just filled with bits of shiny fabric, feathers, lace, faux fur and more. Add this to ready made props, costumes and shoes (oh, the shoes!), and their homes become basically one giant closet/craft room. I don't know about you, but I can certainly relate.
If you love burlesque and are in the greater Vancouver area, I HIGHLY recommend you purchase tickets to Shine: A Burlesque Musical. Local artists have poured their heart and soul into this production, and the result is very interesting and entertaining.
Sunday, August 16, 2009
Zippered Tote-bag How-to
Heart of Mary posted a tutorial for this awesome tote bag that zips up into a little pocket. So handy! Update: The new and improved tutorial for this tote is now available for a small fee at her Etsy shop Simple Things!

To day I made... A Blog!
Hello, and welcome to Intelligent Designs; my blog for anything about craft, creativity, and design.
First, an introduction. My name is Sonya (how do you do!) and I have been wanting to start a blog for a while. The ideas and creations of others have been so inspirational to me in the past, I thought I would pass along the help and information. I can't say just yet what this blog will evolve into, but here are some of the things you're likely to find here in the future:
First, an introduction. My name is Sonya (how do you do!) and I have been wanting to start a blog for a while. The ideas and creations of others have been so inspirational to me in the past, I thought I would pass along the help and information. I can't say just yet what this blog will evolve into, but here are some of the things you're likely to find here in the future:
- Sewing projects: Finished pictures and how-to's
- Knitting: My adventures with yarn and needles
- Cooking: Sometimes making tasty things can be so simple...
- General thoughts on the DIY movement
- Craft projects and inspiration
- Angry Chicken
- Make and Craft Magazines
- Craft Gossip: A craft blogging network
- Futuregirl: One woman's adventures in stitching
- Cut Out + Keep: Craft tutorials blog
Subscribe to:
Posts (Atom)